Using Spotify Web API in Flask

This project was part of my CS50 final project. It is a web app titled ‘Your Spotify Music’ which allows any Spotify user to know some of their listening stats basis their top tracks and albums in the past 6 months. This is the first web app I have ever built. So hopefully, I will be able to explain the process from a beginner’s POV to anyone looking to explore this area.
My motivation behind building this app was to challenge myself by creating a web app with API integration. After scouring multiple videos and articles about how people had used the Spotify API, I finally had my app ready. If you are someone looking to build out their app, follow along!
So how do we begin?
First is figuring out what the goal of our web app. In my case, I had a fair idea that my web-app would allow a user to login into their Spotify account and basis their own listening history, they will be able to see certain stats basis their listening activity.
With this in mind, before we start to think about the coding aspect, let's think about what would be an intuitively logical process to start:
- User needs to login from a webpage: The webpage should have a login CTA which allows the user to login into their Spotify account
- User logs into Spotify through their credentials.
- Once the user is logged in, the user lands on a webpage which provides interesting details of their most listened-to songs.
With this clear in mind, let’s start with step 1
Step 1: Logging in
This will involve 2 parts: designing a webpage with a login CTA and then redirecting the user to the Spotify login page.
To begin with, I’d recommend we create a basic HTML. We can jazz up the page later with Bootstrap. For now, our main objective is to make the app do what it’s supposed to do.
Functionality over Design.
So, we create a simple HTML webpage with a CTA.
Our next step is redirection. How do we redirect to Spotify’s login page?
The part of logging into your Spotify account is based on a set of principles known as OAuth 2.0. As part of OAuth, the app does not store any data of the user, but simply uses a token to notify Spotify to grant access.
You can understand more about the OAuth flow here.
Spotify’s Web API allows for authorization flow. It allows any developer across the world to connect with Spotify’s server and fetch information through the endpoints exposed by Spotify for free. (will explain more about this later). In simple terms, the Spotify API lets my web app talk to Spotify.
Now there are 2 parts to using the Spotify API: first is using the Authorization flow to allow users to log in to their account (OAuth protocol) and second is obtaining information about the songs/artists that the logged-in user is listening to.
Since in our web app, our goal is to show data strictly related to the user who has logged in, we will be the Authorization code flow. This sounds like a mouthful but in simpler terms is just a process to get a user to log in with their own Spotify account.
So how would that work?
Since the user has come on to the web app, it is the web app's responsibility to fetch the Spotify login page from Spotify’s servers. For this to happen, Spotify needs to confirm if the web app which is asking for permission is legit.
Hence it becomes necessary to create an account as a Spotify Developer to be able to use Spotify’s API.
https://developer.spotify.com/dashboard/
By registering for an account, we basically get a ‘Client ID’ and ‘Client secret’ which are basically like a username and password to allow us (and by ‘us’ I mean our web app) to access Spotify’s servers and fetch details as needed.
Once you have done the same and with the structure in mind, we can start with the coding part.
@app.route(‘/login’)def login(): authentication_request_params = { ‘response_type’: ‘code’, ‘client_id’: os.getenv(‘CLIENT_ID’), ‘redirect_uri’: os.getenv(‘REDIRECT_URI’), ‘scope’: ‘user-read-email user-read-private user-top-read’, ‘state’: str(uuid.uuid4()), ‘show_dialog’: ‘true’ } auth_url = ‘https://accounts.spotify.com/authorize/?' + urllib.parse.urlencode(authentication_request_params) return redirect(auth_url)
The first line defines the route. Since we are allowing the user to login, I have used the route name as login.
Now within the login function is a variable ‘authentication_request_params’ of list datatype. This basically is a list of all the parameters which we need to pass so that we can fetch the Spotify login page and show it on our web app.
What all are we passing?
- Response type- this can be kept as code as per the Spotify documentation.
- Client id — os. getenv implies that the client id has to be entered into the terminal under the name CLIENT ID. So how this would work is by entering the following in the terminal export CLIENT_ID = ###
- Redirect URI: This is basically a URI (uniform resource identifier) similar to URL. This must be the same as mentioned in the Spotify developer dashboard. Note that this can be any URL. it has nothing to do with redirection. For all that matters, it can even be https://www.google.com/
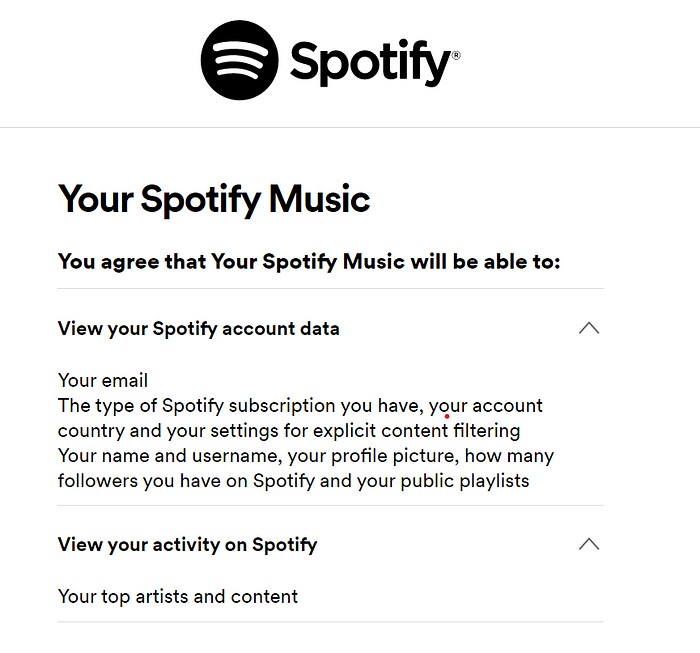
- Scope: This basically gives the scope of reading/writing of users’ data. This tells the Spotify server what your web app will be doing with the user’s data once he/she has logged into your web app. Different scopes are different API calls. so depending on the API calls, you can always come back and include additional scope as required. To know more,
- State: This basically ensures that the user is logged in by identifying the state of the user. Know more about UUID here
These parameters are then passed to the authorization endpoint where urllib.parse.urlencode basically encodes the key-value pairs in the list mentioned above so that they can be appended to the URL.
Finally, in the return function, the function redirects us to the auth_url which we defined above.
Please note that the above values are necessary to be passed as per the universal OAuth protocol. It’s the most commonly used and secure protocol for accessing data from 3rd party apps. Hence, even if you wish to use the authorization flow, i.e. allow the user to login to a different app, say Facebook, the process shall remain the same.
Logging in to Spotify:
Once this function is called, the Spotify login page opens for the user. The URL of the login page will be something like this:
You can see how our parameters have been appended to the URL. In the first step, the code calls the login endpoint of the API. This allows us to log in to Spotify. Once we have logged in, we see a page which asks if we consent the application to use the data.
In OAuth terms, this would basically be the ‘Authorization server’ which confirms with the user for the data that will be shared with the app. Once the user has given permission, our application redirects to the redirection URI. It is at the redirection URI, that the authorization server hands over the ‘access token’ to the web application.
The redirection URI mentioned in the request should match exactly with the redirection URI mentioned in your Spotify Developer account. This is an extra safety measure as part of OAuth which prevents malicious actors from gaining access to your app. In my case, I have set the redirection URI to ‘/callback’ as per the OAuth norms. The redirection URI is not a webpage to be shown to the user, hence will not affect the journey from a front-end user perspective.
def get_access_token(authorization_code:str):  spotify_request_access_token_url = 'https://accounts.spotify.com/api/token/?'  body = {'grant_type': 'authorization_code','code': authorization_code,'client_id' : os.getenv('CLIENT_ID'),'client_secret': os.getenv('CLIENT_SECRET'),'redirect_uri': os.getenv('REDIRECT_URI')}  response = requests.post(spotify_request_access_token_url, data = body)  if response.status_code == 200:  return response.json()  raise Exception ('Failed to obtain Access token')@app.route('/callback')def callback():

  code = request.args.get('code')  credentials = get_access_token(authorization_code=code)  os.environ['token'] = credentials['access_token']  return redirect('/your-music')
We define the ‘get_access_token’ function first so that the ‘callback’ function can call it.
From a code point of view, however, the callback function is called first. within the same, we pass the ‘authorization code’ to ‘get_access_token’. The ‘access token’ is what will allow us to access the various Spotify endpoints to fetch the user’s profile/tracks/artist data.
‘Get_access_token’ returns an entire JSON response. From the JSON, we extract the access token (credentials [‘access_token’]) and pass it as a ‘token’ to Spotify.
Once done, we redirect the user to our final webpage which displays the details. I have mentioned a snippet of the function ‘your_music’ to make clear on how the data can be fetched
@app.route('/your-music')def your_music():user_profile_url = 'https://api.spotify.com/v1/me?'user_top_items_url = 'https://api.spotify.com/v1/me/top/'audio_features_url = 'https://api.spotify.com/v1/audio-features/'
limit_tracks = 18# NB: Add the access token to the request headerheaders = {'Authorization': f'Bearer {os.getenv("token")}'}request_params_artists = {'limit':18}request_params_tracks = {'limit': 18}#Retrieving User details via GET request to user profile endpointuser_profile = requests.get(user_profile_url, headers=headers)if user_profile.status_code == 200:user_profile = user_profile.json()display_name = user_profile['display_name']#Retrieving top Artists details via GET request to top artists endpointtop_artists_url = user_top_items_url + 'artists?' + urllib.parse.urlencode(request_params_artists)artists = requests.get(top_artists_url, headers = headers)if artists.status_code == 200:artists = artists.json()artists = artists['items']
Firstly, I have defined various endpoints in my variables. This is for ease of use. ‘User_profile_url’ is basically the endpoint to get user’s profile details; ‘user_top_items_url’ is the endpoint to get user’s top items and so on…
Now with each request, we shall be passing the ‘token’ we received in the form of headers to the request. This allows Spotify to check if the user with the right ‘token’ is accessing the data.
Let’s consider top_artists_url. Herein we add ‘artists’ as the query parameter along with request parameters we have defined as a list. Next we make a call to the API by mentioning the endpoint (i.e. where we want to hit) and the headers.
From the json response, we get the relevant data for us. One way to visualise JSON data better is through the use of https://jsoncrack.com.
Obtaining details via APIs:
I obtained the following details via the Spotify Web API endpoints. The Spotify Developers Console is a great place to check out all the endpoints with their usage. It also gives a sample of the response that you shall receive by entering some dummy inputs.
- User details: I wanted to personalize the intro of the webpage with the name of the user. I used the following endpoint: /v1/users/{user_id} under the ‘User’s Profile’ section.
- Track features: I wanted to pull in the top tracks and artists for the user and basis that info, I tried to compute certain key metrics of the songs that the user has been listening to in the past 6 months. So this can be divided into 2 parts:
a) Get the top tracks and artists for the user
b) Basis audio features of each top track/artist fetched, return a statistical value (mean, median etc.) to the user.
Top tracks and artists:
The API endpoint for this is /v1/me/top/{type}. To obtain top tracks, one simply enters tracks as the query parameters — /v1/me/top/tracks.
To obtain top artists, enter artists as the query parameters- v1/me/top/type/artists
You can find more details on the detailed documentation here
Audio features:
The API endpoint to obtain audio features is https://api.spotify.com/v1/audio-features/{id}. Spotify gives a number of audio features computed for each track in its database. For the purpose of my app, I used valence, danceability, and key signature. You can choose any of the others. You can find more about it here
Designing the front-end UI:
Designing the front-end UI was much harder than I previously thought thanks to the fact that I hadn’t extensively used Bootstrap before. Bootstrap is a framework which allows one to build mobile responsive websites. Their latest version is 5.2, so make sure you are reading the documentation for the latest version whenever you have queries.
When I started out, I wasn’t clear on how Bootstrap was different from CSS, and I got confused between using different commands for doing the same thing (like changing font sizes, colours etc.). It's important to understand that Bootstrap is basically a CSS library in the sense that it derives its underlying rules from CSS(the base language). So for the purpose of coding, Bootstrap makes it a lot easier to build responsive UI than CSS because of its abstraction and implications.
For example, the web app that I built did not use any library. Another approach I could have taken was to use the Spotipy library. Now Spotipy library would have also allowed me to do the same things as I did but it would have required me to write lesser commands. The same is the case with Bootstrap. It makes the creation of responsive UI (UI which can accommodate different screen sizes) much easier.
After spending some time understanding the concept of containers, navbar, col-md etc I was able to design the UI of my website using Bootstrap.
Some of the resources which helped me expedite my understanding of Bootstrap are below:
- https://youtu.be/4sosXZsdy-s — very useful resource where the creator goes through the step-by-step process of designing the UI of the website and in the process includes many features of Bootstrap
Other resources:
I hope this helps. In case of any enquiry, feel free to reach out at shubham13596@gmail.com or at Twitter